
- Stop interior damage first — contain dripping water, relieve ceiling pressure, and protect furniture.
- Roofing cement (tar) is the fastest temporary patch for small cracks or punctures.
- Roof material determines repair method: shingles = replacement; flat roofs = membrane patches; flashing = resealing.
- Never repair during active rain — wait for dry weather unless performing interior mitigation.
- Leaks around chimneys, vents, and skylights almost always require flashing repair, not shingle replacement.
- Bulging ceilings are an emergency — poke a controlled drain hole immediately to prevent collapse.
Table of Contents
- Introduction: Your Roof Leak Emergency Plan
- 1. Disaster Control: What to Do Immediately When It Rains
- 2. Temporary Patches: Sealing the Leak in Dry Weather
- 3. Permanent Repairs: Solutions for Specific Roof Systems
- 4. The Hidden Costs of Deferred Roof Repair
- 5. Professional-Level Inspection & Long-Term Planning
- ⚠️ What NOT to Do During a Roof Leak (Critical Homeowner Warnings)
- FAQ
Introduction: Your Roof Leak Emergency Plan
A roof leak never happens at a convenient moment. It often begins with the unmistakable sound of dripping during a storm, followed by that frantic rush to find a bucket. In the U.S., roof leaks are one of the most common sources of household water damage — and unfortunately, also one of the most overlooked. Many homeowners dismiss “small drips” as harmless, not realizing that water damage from an untreated roof leak can cost five times more than repairing the initial issue. Worse, leaks left alone for as little as 90 days can lead to hidden mold, structural decay, and insulation failure. Before any repair can begin, a homeowner must identify the leak’s precise entry point. This is why our companion guide, How to Find a Roof Leak: The Complete Guide for All Roof Types, is essential reading. Knowing how water travels on roofing systems is the foundation for successful repair. This guide focuses on HOW TO STOP that leak — whether you need an emergency temporary patch during a storm, or a permanent repair when the weather clears. You’ll learn essential tools, safety procedures, and advanced techniques used by professional roofers, tailored to shingle roofs, flat roofs, flashing repairs, and structural considerations. By the end of this guide, you’ll know exactly what to do in the first 60 seconds, which repair method your roof requires, and when to call a professional for a full diagnostic and permanent solution.1. Disaster Control: What to Do Immediately When It Rains
When a roof leak begins during a storm, your first priority is emergency roof repair inside the home, not climbing onto the roof. Heavy rain, high winds, lightning, and slippery surfaces make exterior work extremely dangerous. The moment you hear dripping, the goal is to stop interior water damage as quickly as possible while preparing for a temporary roof patch once the weather clears. Many homeowners panic and assume the only solution is going outside to plug the leak, but during active rainfall the smartest move is damage control—catching water, relieving ceiling pressure, and preventing spread into insulation or walls. Roof leaks often travel far from their point of origin, so this step buys crucial time to identify the true source later. Whether the issue is a shingle failure, flashing gap, chimney leak repair need, or a flat roof puncture, controlling the interior flow prevents thousands of dollars in secondary damage. This section teaches you how to stop a roof leak inside the home safely and effectively, ensuring you protect structural materials while waiting to perform real repairs once conditions improve.Stop the Drop: Interior Damage Mitigation
When water drips from your ceiling, it often forms a bulging bubble under the paint or drywall. While it may feel counterintuitive, the safest action is:Poke a small hole at the LOWEST point of the bubble.
This controlled release prevents:- A catastrophic ceiling collapse
- Rapid spreading of water inside insulation
- Damage to wiring and light fixtures
- Move furniture away
- Cover large items with plastic sheeting
- Place towels or absorbent materials under active drips
Locating the Source (Fast Version)
While the storm is ongoing, safely check your attic (if accessible) with a flashlight:- Look for active drips on rafters and roof sheathing
- Follow water uphill — it rarely drips straight down
- Avoid stepping on insulation (step only on joists or truss boards)
The Ultimate Quick Fix: Polyethylene Plastic
When you cannot immediately fix the roof outside, covering the interior or attic area with plastic buys time.How to Do It:
- Cut a large piece of 4–6 mil polyethylene plastic.
- Drape it over the attic area above the leak.
- Secure it with tape or staple guns (attic use only; never staple outside).
- Let water run down the plastic into a bucket.
- Lay a large plastic sheet over the suspected roof area.
- Use sandbags or wooden boards to weigh it down.
- Do not nail or screw through the plastic — this creates new leaks.
2. Temporary Patches: Sealing the Leak in Dry Weather
When the rain stops and the roof surface is dry enough to work on, you can begin performing a temporary roof leak repair to stop water intrusion until a roofer performs a permanent fix. This phase focuses on using roofing cement repair, temporary shingle replacement, tarps, and emergency sealants to stop leaks fast. While these methods are not long-term solutions, they are extremely effective for short-term waterproofing and preventing additional storms from causing new interior damage. Whether the leak is caused by lifted shingles, nail pops, minor punctures, damaged flashing, or flat roof blisters, a temporary roof patch can significantly reduce water penetration. Homeowners often use these repairs when waiting for insurance adjusters, contractor availability, or better weather. The key is applying patches only when the surface is dry and safe to walk on—never during active rain. This section covers several proven DIY roof patch solutions for asphalt shingles, flat roofs, and roof penetrations, helping you quickly seal gaps, cracks, or openings and restore basic waterproofing to your home.The Roofing Cement Method (The Classic Wet-Patch Fix)
Roofing cement — also called roof tar — is the most widely used emergency leak stopper.Preparation:
Clean the area thoroughly:- Sweep away debris
- Remove loose granules and dirt
- Dispose of old, cracked sealant
- Dry the area as much as possible
Application:
- Use a putty knife or trowel to scoop roofing cement.
- Press a thick layer over cracks, small holes, nail pops, or sealant gaps.
- Feather the edges so water can’t penetrate under the patch.
For larger cracks:
- Embed fiberglass mesh into the first layer
- Add a second coat over the mesh
- Smooth and seal edges
Temporary Shingle Replacement
The Shingle Slip Method:
- Lift the shingles above the damaged one.
- Slide a new shingle into place.
- Secure with roofing cement (NOT nails).
- Press all shingles down firmly to reseal them.
Tarpaulin for Major Damage
Tarps are the best option for:- Large storm-damaged areas
- Missing shingles
- Exposed decking
- Temporary coverage before professional repair
How to Deploy a Tarp Correctly:
- Choose a tarp large enough to extend several feet beyond the damaged zone.
- Center the tarp over the damaged area.
- Secure the top edge first — ideally under a row of shingles or with sandbags.
- Pull the tarp tight and secure the bottom edge.
- Avoid nailing or screwing through the tarp whenever possible.
3. Permanent Repairs: Solutions for Specific Roof Systems
While temporary patches can stop leaks in the moment, the only way to permanently repair a roof leak is to address the underlying cause directly. Permanent solutions vary depending on your roof type—shingle roofs require replacing broken shingles or repairing nail pops, while flat roofs demand membrane patches, seam repairs, or liquid-applied coatings. Flashing failures around chimneys, vents, skylights, and roof-to-wall transitions are among the most common long-term leak sources, so sealing roof joints or replacing metal flashing is critical. Proper roof leak repair also involves ensuring that ventilation, underlayment, and drainage systems function correctly, as these contribute to chronic leak issues. This section will guide you through long-term repair strategies for asphalt shingles, modified bitumen, TPO, EPDM, and metal flashing systems. Understanding how to fix a roof leak permanently prevents repeated water damage and ensures your home remains protected during future storms.Pitched Roofs (Asphalt/Shingle)
Full Shingle Replacement:
Old or broken shingles should be removed entirely:- Pry up the shingles above
- Remove nails
- Slide in new shingles
- Nail at manufacturer-recommended locations
- Seal nail heads with roofing cement
Nail Pop Repair:
Nail pops let water slip under shingles. Repair by:- Removing lifted shingle
- Hammering down or replacing nail
- Sealing the fastener area
- Resetting shingle with adhesive
Sealing Joints and Seams:
Use high-quality roofing sealant on:- Step flashing
- Chimney edges
- Sidewalls
- Dormers
- Valley edges
Flat Roofs (TPO / EPDM / Modified Bitumen)
Cleaning:
Flat roof patches fail if dirt is left behind. Use manufacturer-approved cleaners.Peel-and-Stick Membrane Patches:
Effective for EPDM (rubber) roofs. Steps:- Clean area
- Apply primer
- Cut membrane patch
- Peel backing and apply
- Roll with pressure roller
Liquid-Applied Coatings:
For aging roofs, premium silicone or elastomeric coatings offer long-term waterproofing.Flashing and Penetration Repair
Re-Booting Vents:
Old rubber boots crack with UV exposure. Replace by:- Removing shingles around vent
- Lifting old boot
- Installing new boot under shingles
- Sealing edges
Re-Sealing Chimneys:
Chimneys require 3 types of flashing and are the #1 leak source. Repair includes:
- Removing old caulk
- Installing urethane or high-heat silicone sealant
- Re-fastening loose flashing
The Importance of Attic Ventilation
Poor ventilation can mimic a leak by creating moisture buildup. Proper ventilation prevents:- Rotting decking
- Mold development
- Ice dams in winter
4. The Hidden Costs of Deferred Roof Repair
Delaying roof leak repair can quietly create severe structural and financial consequences. Even a small leak that begins as a slow drip can lead to widespread interior damage, including soaked insulation, warped drywall, and flooring issues. Over time, moisture intrusion compromises roof decking, rafters, and wall framing, significantly increasing repair costs. In many homes, mold and mildew begin forming within 24–48 hours, creating health risks and requiring expensive professional remediation. Ignoring what seems like a minor leak today can evolve into emergency roof repair tomorrow, often costing thousands more than addressing the issue immediately. This section explains why understanding how to stop a roof leak early is essential and how secondary damage from structural rot or mold can be far more expensive than the initial roof fix. By acting quickly, homeowners protect both the property value and the long-term durability of their home’s roofing system.Water Damage to Interior Structures
Leaks damage:- Drywall
- Paint
- Ceiling materials
- Floors
- Insulation
Structural Integrity and Wood Rot
Long-term leaks cause:- Rotted rafters
- Warped trusses
- Soft decking
- Weakened structural joints
Mold and Mildew Risks
Mold grows within 24–48 hours in damp areas. It can:- Cause health issues
- Spread through HVAC systems
- Require costly professional remediation
5. Professional-Level Inspection & Long-Term Planning
 At some point, homeowners reach the limit of what DIY roof repairs can handle safely. Professional roofing contractors bring specialized tools such as infrared thermal imaging, drone inspections, and advanced moisture meters that identify leaks hidden beneath surfaces. A professional inspection ensures you understand the true cause—not just the symptom—of a leak, whether it’s flashing failure, improper installation, ventilation problems, or a compromised roofing system. This section helps homeowners recognize when a leak requires expert assessment, especially if the roof leak returns repeatedly, spreads, or involves structural areas. Long-term roof maintenance planning also becomes essential: scheduling annual inspections, maintaining gutters, resealing flashing, and checking vulnerable roof penetrations prevent future issues. Knowing how to evaluate a contractor, compare estimates, and secure warranty-backed repairs ensures that your permanent roof repair delivers lasting protection.
At some point, DIY repairs are no longer enough.
At some point, homeowners reach the limit of what DIY roof repairs can handle safely. Professional roofing contractors bring specialized tools such as infrared thermal imaging, drone inspections, and advanced moisture meters that identify leaks hidden beneath surfaces. A professional inspection ensures you understand the true cause—not just the symptom—of a leak, whether it’s flashing failure, improper installation, ventilation problems, or a compromised roofing system. This section helps homeowners recognize when a leak requires expert assessment, especially if the roof leak returns repeatedly, spreads, or involves structural areas. Long-term roof maintenance planning also becomes essential: scheduling annual inspections, maintaining gutters, resealing flashing, and checking vulnerable roof penetrations prevent future issues. Knowing how to evaluate a contractor, compare estimates, and secure warranty-backed repairs ensures that your permanent roof repair delivers lasting protection.
At some point, DIY repairs are no longer enough.
Recognizing the Limits of DIY Repair
Call a professional if:- The roof is steep or unsafe
- The leak recurs
- Water appears far from the roof penetration
- Flashing is involved
- Multiple areas are leaking
What to Look for in a Leak Diagnosis
Professionals use:- Thermal imaging cameras
- Moisture meters
- Drone inspections
- Manufacturer-specific tools
- What caused the leak?
- What’s the permanent fix?
- What warranty comes with the repair?
The Value of Warrantied Repair
Warranties cover materials AND labor—critical for peace of mind.What Should I Do Next?
Before committing to major repair:- Get at least two professional quotes
- Check contractor credentials and insurance
- Ask for past project photos
- Request written estimates
⚠️ What NOT to Do During a Roof Leak (Critical Homeowner Warnings)
Before we move into the final steps and long-term recommendations, it’s important to understand the common mistakes homeowners make during a roof leak. These errors can worsen the situation, increase repair costs, or create dangerous safety hazards. Use this quick reference to avoid making the leak worse: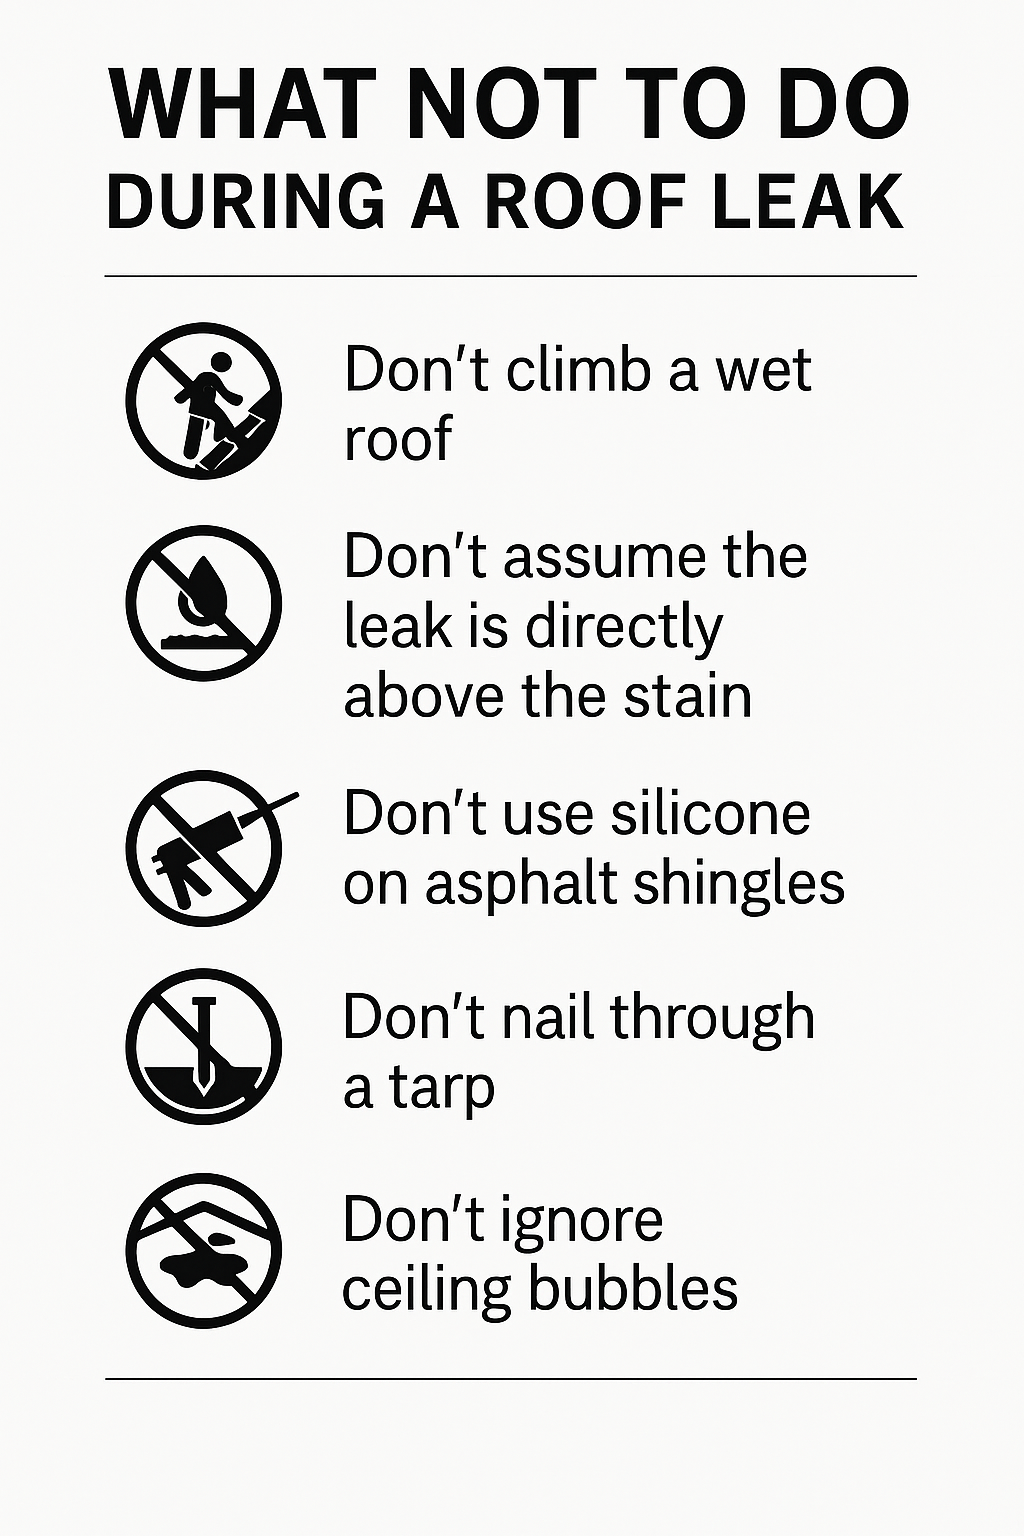
| Don’t Do This | Why It’s Dangerous |
| 🚫 Don’t climb a wet or storm-soaked roof | Rain makes shingles dangerously slippery. Most roofing accidents happen during storms. |
| 🚫 Don’t assume the leak is directly above the ceiling stain | Water travels along rafters and framing. You may “fix” the wrong area and the leak will continue. |
| 🚫 Don’t use silicone caulking on asphalt shingles | Silicone does not bond properly to shingles and prevents future adhesion. Roofers must cut it out to make a correct repair. |
| 🚫 Don’t nail through a tarp | Nailing creates NEW holes in shingles, making the leak worse and potentially voiding warranties. |
| 🚫 Don’t ignore ceiling bubbles or bulges | Bulging drywall indicates pooled water. The ceiling may collapse without controlled drainage. |
| 🚫 Don’t overload attic insulation with water-soaked debris | Wet insulation breeds mold within 24–48 hours and requires full replacement. |
| 🚫 Don’t delay calling a roofer for flashing, valley, or chimney leaks | These areas require precision repairs. DIY attempts often make structural penetrations worse. |