- Highlights:
- What Is Asphalt Sealcoating?
- Why Asphalt Repair Should Come First
- Step-by-Step Guide: Repair Then Sealcoat
- How Often Should You Repair and Sealcoat?
- Signs You Need Professional Asphalt Contractors Who Also Handle Sealcoating
- Common Mistakes to Avoid
- Cost Considerations
- Eco-Friendly Considerations
- DIY vs. Professional Services
- In Closing
Highlights:
-
Always repair cracks, potholes, and damaged areas before applying sealcoat.
-
Sealcoating protects asphalt from water, UV rays, oil, and chemicals, but doesn’t repair damage.
-
Regular inspections help catch minor issues before they become costly repairs.
-
Professional asphalt contractors who also handle sealcoating ensure proper repair, prep, and application.
-
Proper cleaning and surface preparation are critical for sealcoat adhesion and longevity.
-
Sealcoating every 2–3 years prolongs asphalt life and maintains curb appeal.
-
Eco-friendly sealcoat options and proper disposal of asphalt waste can minimize environmental impact.

Maintaining an asphalt driveway or parking lot can feel overwhelming, especially when deciding whether to repair cracks and potholes or go straight to sealcoating. Homeowners often wonder: should I fix my asphalt first, or can sealcoating handle the damage? The answer isn’t always straightforward, but understanding the relationship between asphalt repair and sealcoating can save you money, time, and frustration.
This guide will walk you through everything you need to know. From identifying damage to choosing the right services, we’ll cover the key steps to keep your asphalt surfaces in top shape.
What Is Asphalt Sealcoating?
Sealcoating is a protective layer applied to asphalt surfaces, such as driveways, walkways, and parking lots, to preserve their integrity and appearance. Think of it as sunscreen for your asphalt. Just as sunscreen protects your skin from harmful UV rays, sealcoating shields asphalt from the everyday wear and tear caused by weather, chemicals, and heavy traffic.
How Sealcoating Protects Asphalt:
-
Protects against water damage – Water is one of the biggest threats to asphalt. When it seeps into small cracks, it can weaken the underlying base. Over time, this leads to potholes and significant structural issues. Sealcoating forms a barrier that minimizes water penetration, helping your driveway or lot stay solid and intact for years.
-
Blocks UV rays – Sunlight naturally causes asphalt to oxidize and dry out, leading to cracks and fading. A quality sealcoat blocks UV exposure, keeping the asphalt flexible and maintaining its rich, black color.
-
Prevents oil and chemical stains – Leaking motor oil, gasoline, and other chemicals from vehicles can degrade asphalt over time. Sealcoating helps prevent these substances from penetrating the surface, protecting your investment and keeping your driveway looking clean.
-
Enhances appearance – Beyond protection, sealcoating restores a dark, uniform finish to your asphalt, giving it a fresh, well-maintained look that boosts curb appeal and can even improve property value.
It’s important to understand that sealcoating is preventative, not reparative. If your asphalt already has cracks, potholes, or significant damage, applying sealcoat alone won’t fix the problem. In fact, sealcoating over damaged asphalt can trap water in cracks, accelerating deterioration.
Why Asphalt Repair Should Come First
Before applying sealcoat, it’s essential to repair any damaged areas. This ensures the protective layer adheres properly and maximizes the lifespan of your asphalt surface. Asphalt contractors who also handle sealcoating will always inspect and repair damages before starting the sealing process.
Common Types of Asphalt Damage:
-
Cracks – Hairline cracks or larger splits caused by weather, shifting soil, tree roots, or heavy traffic. If left untreated, they can expand, allowing water to seep into the base.
-
Potholes – Depressions that form when water infiltrates the base, combined with traffic stress. These can worsen quickly if not repaired promptly.
-
Alligator Cracking – A network of interconnecting cracks that resemble an alligator’s skin, often a sign that the asphalt base has failed and may need more extensive repair.
-
Rutting – Long grooves formed in asphalt surfaces due to repetitive, heavy traffic. Over time, rutting can trap water and accelerate cracking.
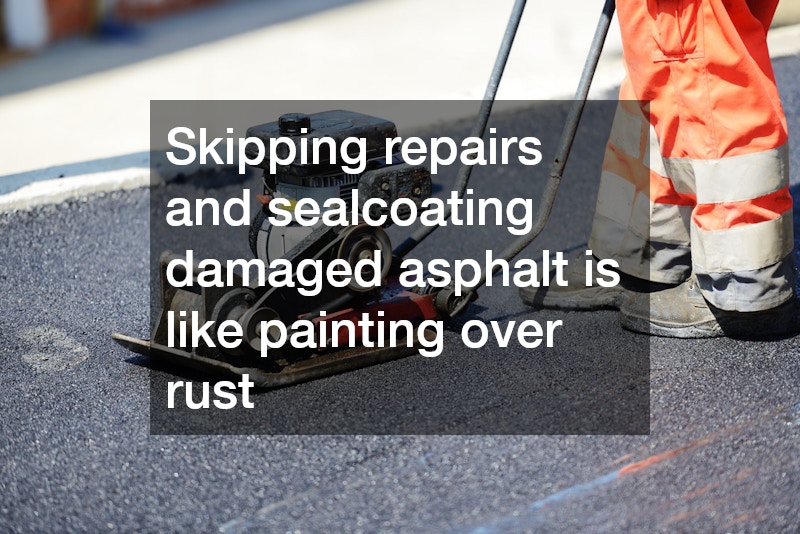
Skipping repairs and sealcoating damaged asphalt is like painting over rust—it might look better temporarily, but the underlying problem remains. Sealcoating works best on smooth, intact surfaces, making pre-seal repairs a critical step.
Benefits of Repairing Asphalt First
Repairing asphalt before sealcoating has several important advantages:
-
Longevity – Small cracks and potholes can escalate into larger structural issues. Timely repairs extend the life of your asphalt.
-
Better Sealcoating Results – Sealant adheres more effectively to a smooth, repaired surface, creating an even protective layer without gaps or bubbles.
-
Cost-Effectiveness – Addressing damage before sealcoating reduces the need for repeated services, saving both time and money in the long run.
-
Curb Appeal – A freshly repaired and sealcoated driveway looks clean, well-maintained, and visually appealing, enhancing the overall appearance of your property.
Professional asphalt contractors who also handle sealcoating will provide a comprehensive inspection, patch cracks, fill potholes, and ensure the surface is fully prepped for sealcoating. This approach guarantees a durable and attractive finish.
Step-by-Step Guide: Repair Then Sealcoat
1. Inspection
A thorough inspection is the first step in ensuring your asphalt receives the proper care. A skilled contractor will assess the condition of your surface, looking for cracks, potholes, drainage problems, and signs of base instability.
-
Identify hairline cracks and larger splits – Determines what type of filler or patching is needed.
-
Locate low spots where water collects – Helps prevent future pooling and water damage.
-
Check for thinning or worn areas – Ensures the sealcoat will have a solid surface to adhere to.
This step prevents minor issues from becoming major problems down the line.
2. Crack and Pothole Repair
Once the inspection is complete, repairs are carried out according to the type and severity of the damage:
-
Crack filling – A flexible asphalt filler is used to seal cracks and prevent water infiltration. This helps stop cracks from widening over time.
-
Pothole patching – Damaged asphalt is removed, and the area is filled with new asphalt. Proper compaction ensures the patch blends seamlessly with the surrounding surface.
-
Overlaying – For areas with widespread minor damage, a thin layer of fresh asphalt may be applied to restore surface integrity and prepare for sealcoating.
These repairs are crucial to creating a stable base for the sealcoat.
3. Cleaning and Preparation
Before applying sealcoat, the asphalt must be thoroughly cleaned. Dirt, debris, and loose gravel can prevent proper adhesion and compromise the effectiveness of the coating.
-
Sweep or blow off loose material – Ensures a smooth surface for the sealcoat.
-
Power wash if needed – Removes oil, grease, or stubborn stains that could interfere with sealing.
-
Dry the surface completely – Sealcoat adheres best to dry asphalt, so sufficient drying time is essential for a durable finish.
Proper preparation is one of the most overlooked but critical steps in achieving a long-lasting sealcoat.
4. Sealcoating Application
With repairs complete and the surface cleaned, sealcoating can begin. The application process may vary depending on surface size and contractor preference:
-
Single coat vs. multiple coats – Some projects benefit from two layers of sealant for added protection and durability.
-
Application methods – Contractors may use a sprayer, brush, or squeegee to ensure even coverage. Large areas often require specialized equipment for consistent results.
-
Drying time – Sealcoated asphalt typically requires 24–48 hours of curing before vehicle traffic is allowed. Weather conditions, like temperature and humidity, can affect drying times.
Professional asphalt contractors who also handle sealcoating ensure that the application is even, thorough, and long-lasting.
How Often Should You Repair and Sealcoat?
The frequency of repairs and sealcoating depends on climate, traffic, and the original asphalt quality.
-
Sealcoating – Generally every 2–3 years for residential driveways.
-
Minor repairs – Annually, or as soon as cracks appear.
-
Major repairs – As needed, based on damage or wear.
Regular maintenance reduces the need for expensive replacement and ensures your asphalt lasts longer.
Signs You Need Professional Asphalt Contractors Who Also Handle Sealcoating
While some homeowners attempt minor repairs themselves, hiring professionals has several advantages:
-
Expertise in assessing asphalt condition.
-
Access to commercial-grade materials and equipment.
-
Knowledge of proper repair techniques and sealcoating procedures.
-
Ability to spot underlying issues that may require more than a cosmetic fix.
If your driveway has multiple cracks, potholes, or areas of alligatoring, it’s time to call in the experts.
Common Mistakes to Avoid
Even with professional help, homeowners can make mistakes that shorten the life of their asphalt:
-
Skipping repairs before sealcoating – Leads to trapped water and worsening damage.
-
Using low-quality sealcoat – Can peel or wear unevenly.
-
Sealcoating too frequently – Can cause buildup and flaking.
-
Ignoring drainage problems – Water pooling leads to rapid deterioration.
Following a proper repair-first approach ensures your investment lasts.
Cost Considerations
The cost of repairing asphalt and sealcoating varies depending on the size of the driveway, the extent of damage, and materials used.
-
Crack filling – Typically $0.50 to $3 per linear foot.
-
Pothole repair – $50–$150 per pothole, depending on size and depth.
-
Sealcoating – $0.15–$0.35 per square foot, depending on number of coats.
Hiring asphalt contractors who also handle sealcoating can sometimes save money by bundling services.
Eco-Friendly Considerations
Some homeowners prefer environmentally friendly sealcoating options:
-
Coal-tar alternatives – Less harmful to waterways.
-
Recycled asphalt products – Can reduce waste and cost.
-
Proper disposal of old asphalt – Ensures compliance with local regulations.
Discuss eco-friendly options with contractors during your consultation.
DIY vs. Professional Services
While small cracks and minor patching can sometimes be done by homeowners, professional contractors bring several benefits:
-
Faster completion with commercial equipment.
-
Long-lasting repairs that prevent future problems.
-
Expertise in combining repairs with sealcoating for maximum asphalt longevity.
For driveways larger than 500 square feet or with significant damage, hiring asphalt contractors who also handle sealcoating is the safest and most effective option.
In Closing
For homeowners looking to maintain their asphalt driveways, parking lots, or other surfaces, the key rule is simple: repair first, sealcoat second. Sealcoating can protect your asphalt from the elements, but without proper repairs, it’s only a temporary fix. By following the steps outlined in this guide and working with experienced asphalt contractors who also handle sealcoating, you can enjoy a smooth, durable, and attractive driveway for years to come.
Remember, investing in preventive maintenance today saves costly repairs tomorrow. Don’t wait until cracks and potholes worsen—schedule an inspection and plan your asphalt repair and sealcoating strategy now.