

Tackling a full home overhaul is rewarding, yet without a clear sequence, it easily devolves into chaos. Too often, enthusiastic homeowners jump straight into eye-catching cosmetic updates before addressing the underlying physical systems of the building. This leads to ruined materials, inflated budgets, and construction delays. Sequencing a comprehensive renovation in the correct order ensures trade specialists work efficiently without damaging previously completed work.
Every successful home makeover depends on a logical progression that balances structural necessity with cosmetic timing. While selecting modern light fixtures or rich hardwood flooring feels like the most exciting part of the process, tackling those tasks before stabilizing the foundation or routing plumbing lines creates massive complications down the road. Following an established construction timeline preserves overall build quality, keeps sub-contractors aligned, and protects your financial investment from start to finish.
This comprehensive guide breaks down the essential order of operations for a whole-home renovation, taking you from early architectural design to final outdoor finishing touches. By adhering to this roadmap, property owners eliminate guesswork, avoid expensive rework, and craft a renovated living space built for long-term comfort.
- Phase 1: Design, Engineering, and Architectural Planning
- Phase 2: Structural Repairs, Demolition, and Substructure Stabilization
- Phase 3: Building Envelope Defense and Moisture Management
- Phase 4: Rough Plumbing, Mechanical, and Electrical Systems
- Phase 5: Thermal Envelope Sealing and Wallboard Installation
- Phase 6: Interior Flooring, Millwork, Cabinetry, and Surfaces
- Phase 7: Fixture Trim-Out, Plumbing Connections, and Custom Glass
- Phase 8: Exterior Landscaping, Hardscaping, and Outdoor Living Areas
- Long-Term Value Through Strategic Renovation Execution
Phase 1: Design, Engineering, and Architectural Planning
Long before demolition crews arrive, every whole-home renovation begins with meticulous design work and technical planning. Attempting to start physical construction without verified blueprints, proper permits, and structured engineering assessments almost always results in budget overruns and severe timeline disruptions.
During this foundational phase, property owners define the overall vision and gather their key design team. Working alongside creative interior designers during early planning clarifies floor plan modifications, spatial flow, lighting locations, and material finishes before trades arrive on site. These design professionals generate exact dimensional drawings and specification guides that keep framing carpenters, plumbers, and electricians on the exact same page throughout the project build.
Simultaneously, structural engineers must evaluate load-bearing walls, foundation capacities, and roof loads to draft structural plans required by local building departments. Securing municipal building permits can take several weeks or even months depending on the jurisdiction, making this planning period the ideal time to order long-lead items such as custom cabinetry, windows, exterior siding, and imported tiles. Establishing a crystal-clear scope of work during this initial design phase protects the overall project from costly, time-consuming change orders once active building work gets underway. Additionally, establishing a dedicated contingency fund of fifteen to twenty percent during design planning provides a crucial safety net for unexpected structural anomalies uncovered once walls are opened.
Once all architectural blueprints receive formal approval, project managers can draft a realistic master timeline, establish sub-contractor agreements, and schedule material deliveries for a seamless launch.
Phase 2: Structural Repairs, Demolition, and Substructure Stabilization
With permits in hand, construction commences at the bottom of the structure. Property owners must resolve all structural defects before spending time or money on interior framing, drywall, or surface finishes.
If a home exhibits shifting footings or cracked walls, scheduling expert foundation repair must be the top priority. Installing steel piers, stabilizing load-bearing footings, or leveling settled concrete slab sections prevents ongoing structural movement that would later crack fresh drywall, pop floor tiles, and misalign custom kitchen cabinets. Ignoring foundational settling will ruin even the most expensive interior upgrades in a short amount of time.
Concurrently with foundation work, selective interior demolition clears out unwanted non-load-bearing walls, worn-out plaster, obsolete wiring, and decayed subflooring. Demolition down to the bare structural studs grants construction teams total visibility into hidden framing cavities to identify hidden termite damage, dry rot, or historic framing notches that need reinforcement.
Carpenters can then install new structural support beams, sister damaged joists, and frame out new interior room layouts according to the approved engineering blueprints. Building a straight, level, and solid structural core creates an ideal canvas for every subsequent trade that enters the building.
Phase 3: Building Envelope Defense and Moisture Management
Once structural framing is stable, attention shifts immediately to weatherproofing the exterior shell. Constructing new interior rooms inside a structure that leaks rainwater from above or ground moisture from below invites destructive mold growth, wood decay, and ruined insulation.
Exterior building envelope work starts at the top with roof repairs or full replacement, followed by exterior house wrap, flashing details, and new window and exterior door installations. Simultaneously, managing ground moisture at the lowest level of the house is equally critical. Engaging a dedicated basement waterproofing company ensures subsurface groundwater cannot seep into lower living areas through hydrostatic pressure or porous masonry walls. Waterproofing specialists install internal perimeter drainage channels, heavy-duty sump pumps, wall vapor barriers, and exterior drainage membranes to maintain a totally dry subterranean environment. Properly integrated exterior gutters and downspouts should also be positioned during this step to funnel heavy rainfall far away from the perimeter backfill zone.
Sealing the building envelope also involves caulking window openings, installing proper head flashings, and repairing damaged exterior fascia boards. Establishing a completely dry, weather-tight shell enables interior trades to work continuously regardless of severe storms or freezing weather outdoors.
With surface water diverted far away and moisture infiltration completely halted, framing materials dry out thoroughly, setting the stage for safe mechanical rough-ins without risking trapped moisture within interior wall assemblies.
Phase 4: Rough Plumbing, Mechanical, and Electrical Systems
With a dry exterior shell and modified interior framing completed, mechanical trades begin installing core utilities inside open wall and ceiling cavities. This phase involves routing pipes, ducts, and electrical runs before walls are covered with drywall.
Plumbing contractors install main drain lines, water supply pipes, vent stacks, and rough shower valves. Updating plumbing lines to modern copper or PEX tubing during this phase also eliminates legacy pressure drops and protects against future pinhole leaks buried inside closed partitions. HVAC mechanics pull ductwork, run refrigerant lines, and set exhaust venting through the roof or exterior sidewalls. Concurrently, an experienced local electrician pulls wiring, sets electrical boxes, upgrades the service panel, and runs dedicated circuits for modern high-draw appliances.
Strategic trade sequencing inside open walls prevents conflicts over tight ceiling spaces and wall cavities. Plumbers receive initial priority to establish proper pitch for gravity-fed drainage lines, followed by HVAC technicians placing rigid air ducts, and finally electricians who can flexibly weave wiring around fixed mechanical systems.
Before wall cavities are sealed shut, local municipal inspectors conduct comprehensive rough-in inspections to ensure all plumbing, mechanical, and electrical configurations meet current building safety codes. Passing these inspections offers peace of mind that concealed utility systems are operating safely before drywall hides them from view.
Phase 5: Thermal Envelope Sealing and Wallboard Installation
Following the mechanical rough inspections, the focus moves toward insulating wall cavities and closing up the living spaces. Proper insulation controls interior temperature, lowers utility costs, and significantly reduces acoustic transmission between rooms.
Hiring a specialized attic insulation installer ensures the top thermal boundary is fully sealed using blown fiberglass or dense spray foam insulation. Properly insulating and venting the attic prevents winter heat loss, reduces summer thermal loads, and stops ice dam formation along roof eaves, preserving the structural integrity of the roofing system.
Simultaneously, exterior wall cavities receive high-density fiberglass batts or spray foam insulation to create a continuous thermal barrier around the living quarters. Sound-damping insulation can also be placed around bathroom walls, laundry rooms, and bedroom partitions to enhance acoustic privacy throughout the house.
Once insulation passes municipal energy code checks, drywall crews hang moisture-resistant sheetrock in wet areas and standard boards in dry living spaces. Professional drywall tapers apply multiple smooth coats of joint compound, sanding each layer meticulously to produce flawless surfaces. Applying a high-quality PVA drywall primer across fresh wallboard seals the paper and compound, creating a uniform foundation for interior paint, trim installation, and custom cabinetry.
Phase 6: Interior Flooring, Millwork, Cabinetry, and Surfaces
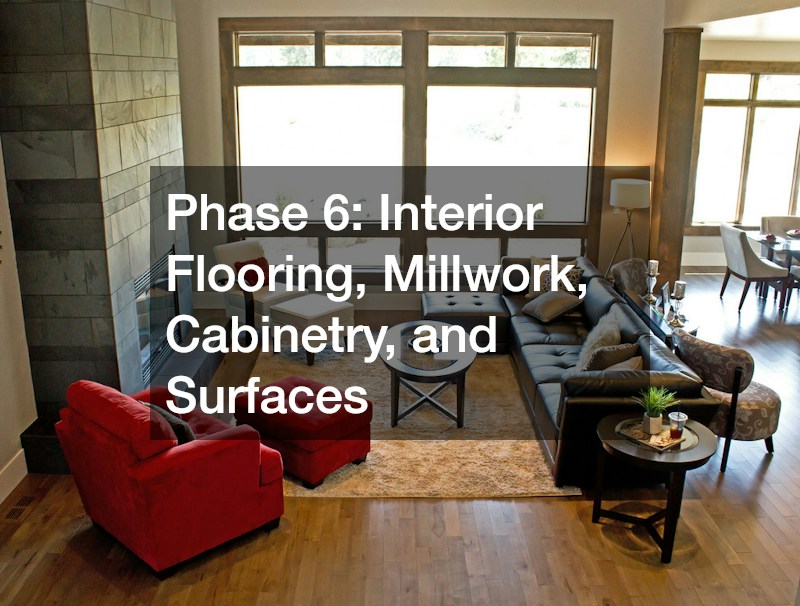
With primed drywall in place, the home transitions from structural construction into detailed interior finish work. Precision carpentry and surface installations bring character and functional luxury to every room.
Finished flooring, including site-sanded hardwood, engineered wood, or porcelain tile, is installed early in this phase so trim molding and cabinetry sit cleanly on top of finished floor levels. Proper subfloor preparation – such as checking for deflection and applying self-leveling underlayment – guarantees that heavy surface materials sit perfectly flat and silent underfoot. Once floors are laid and protected with heavy protective board coverings, trim carpenters set interior doors, wrap windows, nail baseboards, and install custom kitchen and bath cabinetry.
While interior woodwork progresses, homeowners can also coordinate exterior functional upgrades. Scheduling a prompt garage door repair or replacement during this period keeps the garage secure for storing materials while boosting curb appeal.
After kitchen cabinet boxes are anchored level, fabricators take precise measurements to custom-cut countertops made from durable granite, quartz, or marble. Precision templating guarantees snug seams, proper overhangs, and perfect undermount sink cutouts. While waiting for stone fabrication, interior painters apply final finish coats to walls, ceilings, and architectural trim work, setting a polished backdrop for final utility connections.
Phase 7: Fixture Trim-Out, Plumbing Connections, and Custom Glass
With custom surfaces mounted and fresh paint dry, trade contractors return for their final trim-out visits. This crucial phase turns decorative shell spaces into fully operational, high-functioning rooms.
Electricians install decorative chandelier lighting, flush-mount fixtures, switch plates, and smart home controls. Plumbers mount designer faucets, connect under-sink drainage, drop in tub fixtures, and set toilets. Kitchen installers hook up built-in ranges, dishwashers, and refrigeration units, while tile setters craft intricate kitchen backsplashes above new counter surfaces.
In master bathrooms, installing a sleek frameless shower door represents a key finishing step after wall tile and grout cure completely. Specialty glass installers take exact micro-measurements of finished tile openings to custom-cut heavy tempered glass panels. Securely anchoring heavy glass hinges directly into solid wood backing behind wall tile ensures leak-free water containment, effortless door movement, and a luxurious open aesthetic.
Completing these detailed fixture connections converts raw construction into fully functional living spaces. Thorough testing of electrical outlets, water pressure, and plumbing drainage systems confirms that all interior utilities operate flawlessly before turning final focus toward exterior property grounds.
Phase 8: Exterior Landscaping, Hardscaping, and Outdoor Living Areas

With interior construction completed and heavy material delivery trucks off the property, the renovation schedule transitions outdoors to finalize exterior living zones and property grounds. Saving major hardscaping work for the final phase prevents heavy construction machinery from scratching fresh driveways or damaging newly established lawn areas.
Enlisting a professional landscaping contractor allows property owners to correct final ground grading, ensuring rainwater drains away from foundation walls. Landscape crews prepare topsoil beds, lay fresh sod, plant specimen trees, and install low-voltage garden lighting alongside automated drip irrigation systems.
Simultaneously, specialized hardscape crews install outdoor living features like custom patios, stone walkways, retaining walls, and fire pits. Utilizing concrete pavers, natural flagstone, or stamped concrete creates an inviting transition between indoor living rooms and outdoor recreational spaces.
Finishing exterior grounds enhances curb appeal, protects the home foundation from standing surface water, and provides a polished frame for the renovated residence. Completing these outdoor elements marks the official finish line of a comprehensive whole-home transformation, leaving the property fully rejuvenated inside and out.
Long-Term Value Through Strategic Renovation Execution
Executing a whole-home renovation requires a balanced combination of patience, trade coordination, and strict adherence to a proven construction timeline. By prioritizing structural stability, exterior moisture defense, and rough mechanical infrastructure before investing in high-end cosmetic finishes, property owners protect their financial investment from unnecessary damage and expensive rework.
Each phase of the renovation sequence builds directly upon the success of the one before it. Skipping essential steps or rushing cosmetic upgrades before structural framing and mechanical systems pass municipal inspection invariably leads to frustration, budget leaks, and compromised build quality. Following a logical order of operations keeps trade professionals working efficiently and maintains high craftsmanship standards across every single room.
When homeowners collaborate with trade experts and respect construction progression, the renovation journey transforms into an organized, rewarding experience. With clear communication, realistic expectations, and proper sequencing, transformational home renovations become predictable, manageable, and deeply satisfying milestones in homeownership. The final result is a structurally sound, highly energy-efficient, and beautifully finished home that offers comfort, daily utility, and lasting financial value for generations to come.